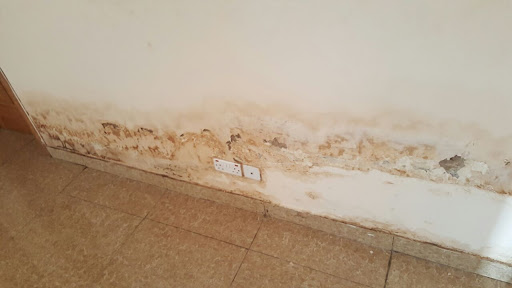
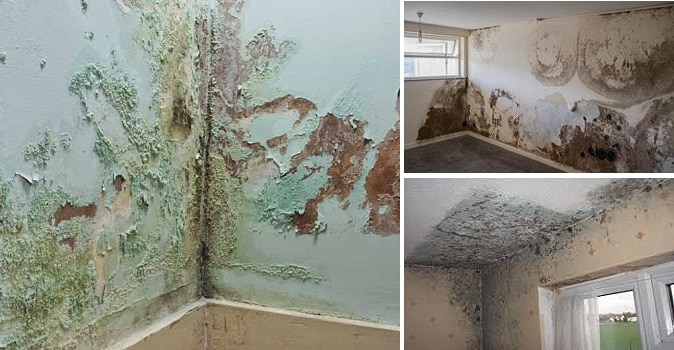
Many people have had some experience with damp in their homes and it’s never positive.
Damp can damage internal decoration and cause problems such as flaking paint, crumbling plaster, curling wallpaper and rotting skirting wood fittings. The biggest impact is that it changes the atmosphere of your home from somewhere cozy and welcoming to an uninviting and unsightly and usually moldy space because damp and mold usually go hand in hand. There are health risks associated with living in a home with damp and mold, particularly for the young, elderly, or those affected by asthma and other respiratory conditions.
If your damp problem is not dealt with, it can lead to more serious complications further down the line and affect the structural integrity of your building. In this guide we look at damp proofing methods for interior walls.
What Causes Damp Walls?
The first step in fixing damp walls is identifying the source of moisture. To do this, you will need to carry out checks of your home both internally and externally.
Damp patches on walls can be caused by a number of underlying issues, such as:
- Condensation
- Rain water penetration
- Defective roofing
- Leaking gutters
- Faulty down pipes
- Vegetation damaging masonry and render
- Roots damaging foundations or damp proof courses
- Rising damp
- Defective sealing of windows and doors
- Cavity Wall Insulation
Once you have identified the source of the problem, you should resolve it before tackling the effects of damp inside your home.
Here’s some more information on the common causes of damp:
Condensation
If you suspect that your home is damp because of condensation – you are likely to see excess moisture on your windows and black mould on surfaces – you can combat this by ensuring that your house is well ventilated. This may involve the installation of a positive input ventilation unit or increasing the ventilation with a passive vent.
Rising Damp
If rising damp is the cause of your damp walls, you are likely to see tide marks of salts and dark patches on walls that can be damp to touch. We suggest reading our guide to treating rising damp for further information.
Penetrating Damp
You may have building defects that are causing your damp walls. These can be both external and internal faults. Some of the more common external issues are mentioned above like defective roofing, leaking gutter, and faulty downpipes.
Depending on the types of materials used in your walls, you may be more likely to suffer from water entering in this way or what is referred to as penetrating damp. Thin walls and walls made from porous materials are more susceptible to water ingress. Cavity walls tend to be less vulnerable to penetrating damp. Faulty or incorrectly installed seals around doors and windows can also allow water into your property.
These types of faults all result in water from outside coming into your home and causing damp walls. You may also have an external building fault such as damaged render that allows rainwater to penetrate and enter your home. If you live in an area with high winds then this increases the likelihood of rain getting in. With penetrating damp, you need to start by resolving the source of damp.
How to Damp Proof A Wall
With so many damp proofing methods and products available, it can be confusing when deciding which option is the best for your situation. We offer a number of different solutions that can be used to give you a dry wall.
- Damp proof membranes
- Damp proof paints
- Tanking slurries
- Water resistant renders & admixtures
What is a damp proof membrane?
Damp proof membranes are made from High Density Polyethylene (HDPE), which is impervious to moisture and salts. They are fixed to internal walls after the source of the damp has been resolved.
The surface of the membrane has an egg box-like profile, which creates a cavity, or an air gap that allows moisture to evaporate from the wall behind.
The Damp Proofing Process
Using damp proof membranes are a great way to damp proof walls as they are easy to install and also extremely flexible. This flexibility means that they can cope with structural movement, which ensures your damp proofing lasts for decades.
Installing a damp proof membrane
- Once you have rectified the original source of the damp, start by removing the old plaster work and render back to the original masonry
- Cut the damp proof membrane to size using scissors
- Place the membrane on the wall, carefully folding around the corners
- Drill the damp proof membrane to the wall ensuring a tight fit
- Fix the membrane in place with special membrane fixing plugs
- Seal all joints and overlaps with Fleece Over Strip
Damp Proofing Walls with Damp Proof Paints
When it comes to damp proofing walls with damp proof paint, the best results are achieved by applying the paint to the background substrate and then covering with a render or plaster. This creates a sandwich system that holds the damp proof layer within the makeup of the wall, keeping moisture at bay.
Damp proof paints can also be applied directly to the plaster surface, however, by locking moisture into gypsum-based material, it can may cause the gypsum to degrade over time. We do not suggest damp proof paint is used over salt-contaminated surfaces as this could de-bond the paint.
Damp Proofing Brick Walls with Tanking Slurry
Another way of damp proofing brick, concrete and masonry walls is to hack back to the original masonry and apply a tanking slurry. Tanking Slurries are cement-based waterproof coatings that are brush applied to masonry to create a fully waterproof barrier. They are able to withstand large water pressures. Although normally used in basement waterproofing scenarios, they work really well for blocking damp above ground.
Once the surface has been prepared, simply apply a salt inhibitor primer. You should then apply two coats of tanking onto the wall, approximately 4-8 hours apart, before rendering over with renovating plaster or a sand and cement render. This will give you a fully bonded waterproof coating that will block all damp from passing through to your new finish.
Tanking slurries cannot receive a dot and dab finish or a direct plaster finish. They must have a minimum of a 10mm cement-based render over the surface before either of the above can be applied.
Re-Plastering Damp Walls
In a lot of cases, you can simply hack back to the original masonry and re-render and re-plaster the damp wall with a water-resistant render. This will keep any residual moisture in the wall and stop it from passing through to new finishes whilst allowing the wall to dry out naturally.
We supply a waterproofing admixture that can be added to a clean sharp sand and cement render mix to create a water and salt resistant render.
Preventing Damp Walls
With these small steps, you can start to reduce the chance of damp in your home:
- Condensation – ensure good ventilation and minimize creating moisture internally
- Good outdoor maintenance to your property
- Monitor external vegetation to reduce the risk of it damaging masonry and render
- Don’t plant large plants near your house as roots may damage foundations or damp proof courses
- Rising damp – ensure external ground levels are 150mm below DPC level
- Check windows and doors for defective sealing


